Friday, March 15, 2013

Love at First Stamp Spring Blog Hop


Welcome to my page.  Hopefully you have been following our blog hop and have just come from Susan's Blog checking out her fabulous Mother's Day projects.  I will be sharing with you some great projects for Memorial Day.  I love the patriotic holidays...after all I did get married on July 4th.  So I was so excited to created some patriotic projects.  The first is a Thank You card that would be perfect for any serviceman/woman.  It was inspired by this awesome sketch done by Jennifer Campbell.  


And here is my take on it.  I used Midnight Muse, Cherry Cobbler, and Very Vanilla  card stock, some DSP from the Comfort Cafe pack, and the heart Itty Bitty Buttons.  I did both wet and dry embossing here using the Cherry Cobbler Embossing Powder with some Versa Mark for the From My Heart stamp.  On the card stock flags, I used the following embossing folders; Square Lattice, Argyle and Fancy Fan and of course my Big Shot.  I can't imagine crafting without it.  Finally I added some Cherry  Cobbler card stock on top of the buttons and topped it off with Cherry Cobbler Dazzling Details.  


And here are few other Americana projects, perfect for Memorial Day through Labor Day.  The first is a banner I created using the fabulous Designer Rosette Big Shot Die.  This was SO easy to make, I have one for every season.  Again I used Midnight Muse and Cherry Cobbler, but this time I also used Whisper White and some of the Silver Glimmer Paper.  I used the patterned paper in Midnight Muse and Cherry Cobbler from the DSP paper stacks.  My favorite alphabet stamp, Morning Post, was perfect for the spelling Liberty.  I finished it off with some Silver flowers made with the scallop circle punch and a little dot of Cherry Cobbler Dazzling Details.  I adhered the rosettes to a strip of cardboard for stability and then finished it off with some Midnight Muse stitched satin ribbon.    


And finally is another home decor piece.  I used the Fashionable Hearts Sizzlits a few times (to say the least) to create this "sweet heart."  Again, I stuck with Midnight Muse, Cherry Cobbler, and Whisper White, this time on mounted on Crumb Cake card stock.  I added the USA banner using the Notable stamp set with some Cherry Cobbler baker's twine and pennants created with the Petite Pennants Punch.  It's such a simple idea and I love the way it turned out. 


Thanks for checking out my projects.  Please leave a comment and subscribe to my blog!  Now hop on over to Gail's page to see what she has to show us for Father's Day!

Saturday, March 9, 2013

The sky is the limit!

I love how with a little imagination, inspiration, and the right tools, I can transform paper into anything I want.  Here is a decor piece I made for my craft room.  Its like a little printers tray made completely out of paper.  I used Lucky Limeade, Pool Party, and Island Indigo.  These colors will most likely retire come May, so I am going to enjoy them while I can!


Here is a close up of the first row.  I used a little bit of everything in each compartment.  I inked everything to give it some visual interest.  I love the pearls on the butterflies! 


For the middle row, the sentiment is from the Pursuit of Happiness stamp set, which is one of my favorites.  I also made a little spinner which does move.


On the last row, I used the bird from the Language of Friendship stamp set and the Bird Builder Punch.


Here is a list of supplies used:

Card Stock: Lucky Limeade, Pool Party, Island Indigo, and Whisper White
DSP: 2011-2013 In Colors Paper Stack
Ink: Lucky Limeade, and Pool Party, and Island Indigo
Punches: Curly Label, Decorative Label, 1" Square, Dotted Scallop Ribbon Border, Large Oval, Boho Blossoms, Bird Builder, 3/4 " Circle
Big Shot and the following Big Shot Supplies: Delicate Doilies Sizzlits, Beautiful Wings Embosslits, Fashionable Hearts Embosslits, Floral Fusion Sizzlits, Fancy Fan Embossing Folder
Accessories: Pearls, Vintage Faceted Designer Buttons, 3/8" Designer Printed Brads, Island Indigo and Lucky Limeade Baker's Twine

Wednesday, March 6, 2013

Mini Album


I made this little mini album awhile back, but wanted to share it on my blog.  It uses some of my favorite pictures of my daughter along with some fantastic DSP from Stampin' Up!  The album is really easy to make and would be great for any special occasion that you would like to document where you only have a few pictures.  Here I used the Razzleberry Splash Simply Scrappin' Kit along with coordinating cardstock, ribbons, DSP and other accessories.  I ordered this kit right away because of the fabulous color combo: Lucky Limeade, Rich Razzleberry, Pink Pirouette, and Night of Navy.    


Opening up the album, it seems fairly simple, but then you realize there is so much more!


Each page folds up and out to reveal several more pictures.  You can add a spot for journalling the whole album or adding captions for each picture.  


Here is one of the pages I just decorated with some of the amazing card stock stickers.  


And the back, embellished with a fun embossed, layered flower.  


Here is a complete list of SU! supplies used to make this album.  

Razzleberry Splash Simply Scrappin' Kit (with lots left over!)
2011-2013 In Color Designer Series Paper Stack
Brights Designer Series Paper Stack
Regals Designer Series Paper Stack
Brights Designer Buttons
3/8" Taffeta Ribbon in Not Quite Navy and Perfect Plum
Fun Flowers Bigz L Die
Vintage Wallpaper Embossing Folder
Buttons #5 Sizzlits
Notable Stamp Set
Paper trimmer
Simply Scored
Big Shot

Thanks for looking!  Happy crafting!

Saturday, March 2, 2013

More Home Decor Pieces

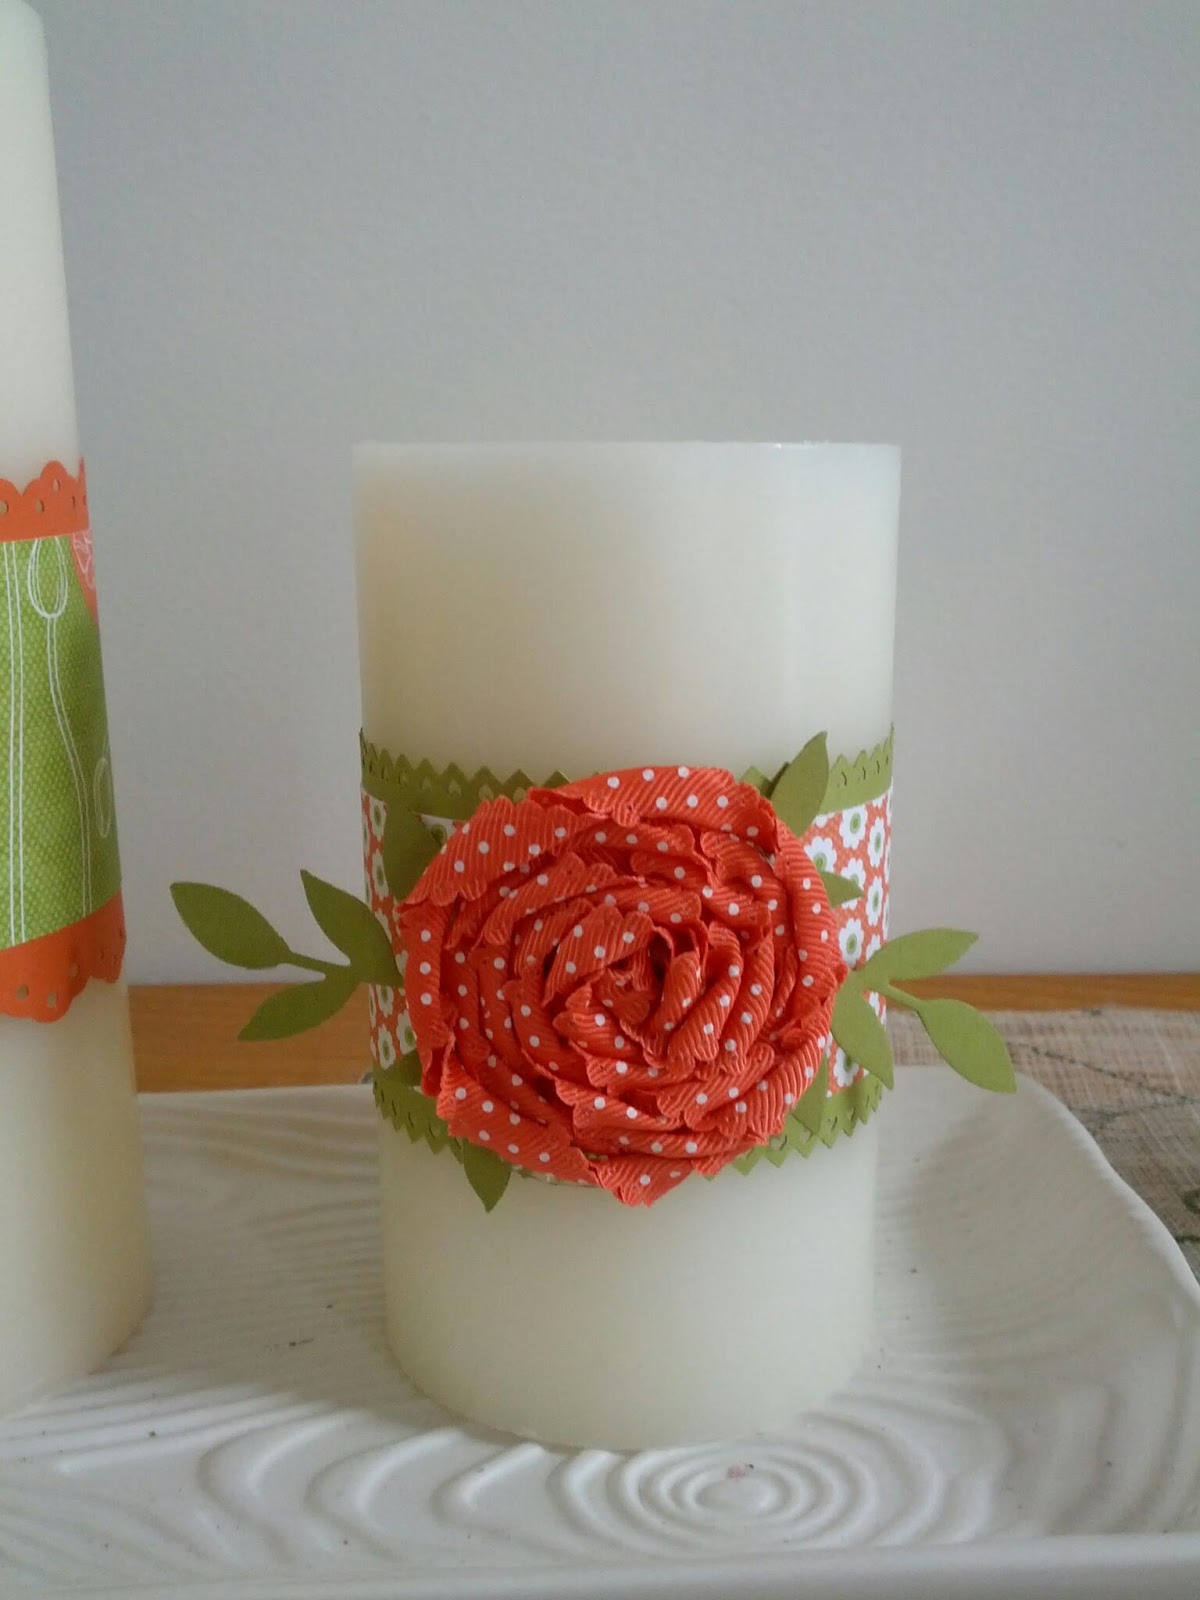
Like I said yesterday, I am ready for spring.  So my plan is to use my paper crafting skills to add some spring time decor around our house.  Today I added some paper and ribbons to a pillar garden. 


For the shortest candle, I just added a few pieces of ribbon.


For the tallest candle I used some of the Floral District DSP along with some Tangerine Tango punched with the eyelet border punch.


For the medium candle I used more of the Floral District DSP with Lucky Limeade punched with the pinking hearts border punch.  This time I added a coiled flower made from the Tangerine Tango polka dot scallop ribbon with some Lucky Limeade leaves made with the Little Leaves Sizzlits Die.  


I can't emphasize enough how easy this was to make.  I am excited to add more spring decorations around my house, even though we might get some snow next week.  Enjoy the weekend and I will be back on Monday with some more great paper creations.     

Friday, March 1, 2013

Home Decor Pieces

Paper is an amazing thing...there is so much more you do with it besides scrapbooking and card making.  I have a small space in my kitchen that needed something.  So I have made these little seasonal signs.  I will begin with the one I made today, which I can honestly say took me about an hour to make.  With Stampin' Up! supplies, everything is so easy to mix and match.  All banners use the Morning Post alphabet stamp set and the Designer Rosette Die for the Big Shot.  These rosettes are so easy to make!  Here I used the Floral District DSP with matching card stock and ribbon to make a fun spring banner.  I am just starting to making my own flowers out of paper using our awesome punches.   


Below is a banner I made for Valentine's Day using the More Amore DSP along with coordinating card stock and accessories.  


Here is my Christmas banner using the Be of Good Cheer DSP with matching card stock, ribbons and buttons.

This was actually my first banner I made and I still love it.  The Orchard Harvest DSP is perfect for fall.


I still want to add more spring decorations around my house even though its only the first day of March.      I wish everyone a wonderful and creative weekend! 

Thursday, February 28, 2013

Something old...

Awhile back I took one if those "what's your scrapbooking style?" quizzes.  I remember not being happy with the results because I am not sure I have a particular style.  There are a few styles that I don't play with as much and one those is vintage.  I love the look of it and I can think if so many people in my life who would love a vintage themed paper craft.  Here are a few cards I made in the vintage style.


Summer Starfruit, Basic Black and Whisper White are such fabulous colors together.  The print paper is from the Sycamore Street DSP.  I embossed the black cardstock with the Vintage Wallpaper embossing folder to give it some texture.  I also used several different framelits layered together (Window Frames and Apothecary Acents) with some paper piercing.  The stamp is from the Vintage Verses set from Sale A Bration.  I topped it off with some satin stitched ribbon in Summer Starfruit.  


In this card I used Baja Breeze, Soft Suede and Very Vanilla to create a vintage feel.  Again I used the Vintage Wall paper embossing folder, this time I inked the Very Vanilla paper up to give it a worn look.  The Labels Collection framelits along with the Apothecary Art Stamp set work so well together.  I used both seam binding ribbon in Baja Breeze and the Crochet trim.  Coloring with the blender pen gives the stamp a soft look and I finished it off with some pearls.


This card uses Very Vanilla and Raspberry Ripple cardstock along with the First Edition DSP.  I want to start using this paper more, because you get so much in a pack and its so versatile.  I stamped the flower from the Papaya Collage stamp set in Raspberry Ripple.  Then I crumpled it up and inked it up with Crumb Cake ink.  I used inked up the Apothecary Accent framelit and used another stamp from the Vintage Verses stamp set.  Finished it off with some rhinestones and some more stitched satin ribbon.   


For this card I also used the Papaya Collage stamp set.  I only used two inks here, Calypso Coral and Soft Suede.  The combo of the Crumb Cake, Very Vanilla and Calypso Coral is so pretty.  I used some Very Vanilla seam binding ribbon along with a Very Vanilla brad on the butterfly.  The "hello" sentiment is from the Pennant Parade stamp set.    

Wednesday, February 27, 2013

All Dressed Up

I love the All Dressed Up framelits from the Spring Catalog.  I have only made a few cards so far but I can't wait to try creating some home decor pieces and gift tags.  Plus with all the fantastic SU! DSP, the options are endless.  Here are my creations so far. 


Above, I used the Sycamore Street DSP along with the All Dressed Up Stamp set and Framelits.  I liked the idea of embossing the cardigan to give it some texture.  And the rhinestone buttons added a perfect touch.  


Here I used paper from the Print Poetry DSP paper pack, perfect for card makers along with the Patterns Pack DSP paper in Raspberry Ripple along with the matching stiched ribbon.  The Summer Starfruit dahlia added a nice touch to the Primrose Petals cardigan.  The sentiment is from the Create a Cupcake stamp set.  


Nothing says fabulous and girlie like a Little Black Dress.  I embossed this one with the Fancy Fan embossing folder.  I cut the dress form out of the First Edition DSP to give it a vintage feel.  Add a purse, some accessories, and a great heel and we have a fantastic outfit and cute card!